
Hardwood floor refinishing can make a twenty or fifty year old floor look close to new for a fraction of what replacement costs, but only when the right process is matched to the floor in front of you. Some floors need nothing more than a light abrasion and a fresh topcoat, others need a full sand to bare wood, and a few have quietly run out of wood altogether. This guide explains how professionals tell those situations apart, what happens on site, how stain and finish choices age, and why autumn, with the windows shut and the furnace starting up, changes how the work should be scheduled.
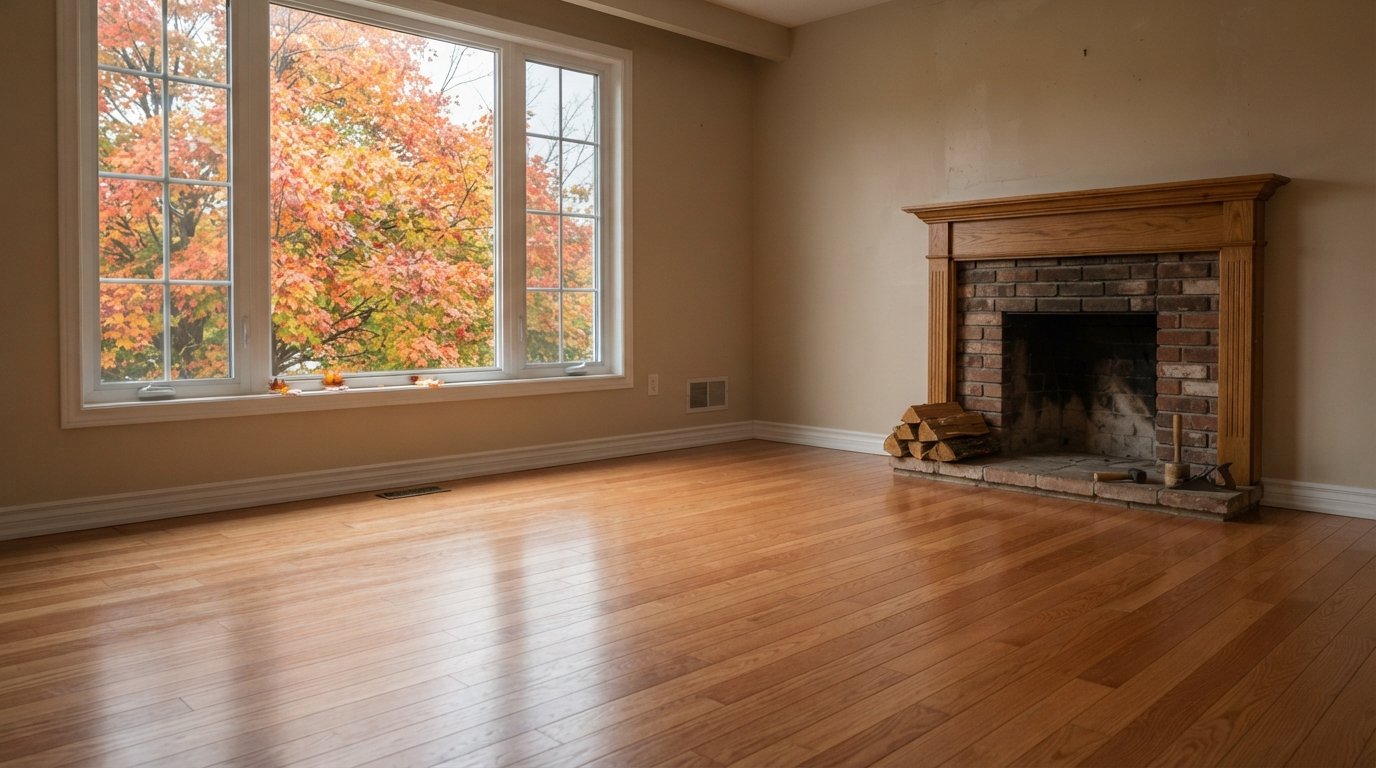
What Hardwood Floor Refinishing Actually Involves
The phrase covers two very different jobs, and many confusing quotes come from mixing them up.
Screen and recoat (also called buff and coat) leaves the wood untouched. A buffer fitted with an abrasive screen scuffs the existing finish so a new coat can bond, the floor is vacuumed and tacked, and one or two fresh coats go on. It removes the dull, grey look of worn traffic lanes and hides fine surface scratches, but it does nothing for dents, deep scratches or stains in the wood. Think of it as maintenance rather than repair.
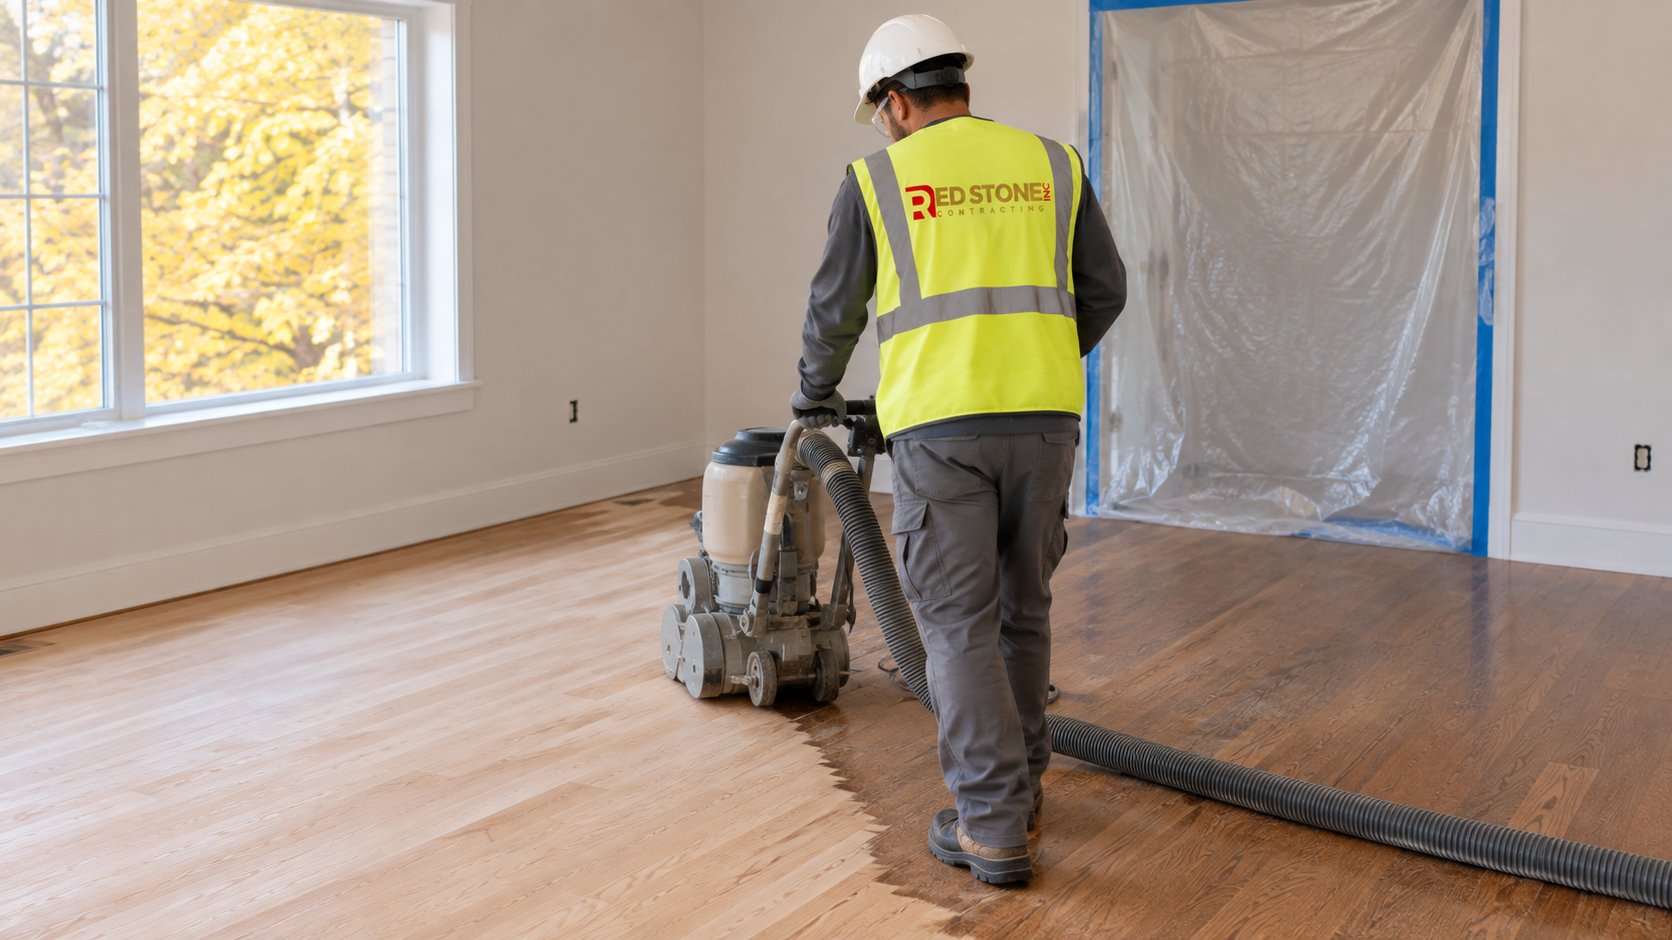
A full sand takes the floor back to raw wood. A drum or belt sander does the open field, an edger does the perimeter, a scraper handles corners, and a buffer blends the scratch patterns together. Then comes optional stain and usually three coats of finish. This is the version of hardwood floor refinishing that can change colour and remove marks sitting near the surface.
In older homes where trim, plaster and original millwork are also being brought back, it is worth planning the floor alongside the rest of the heritage and home restoration work, because shoe moulding usually comes off for a full sand and that is the cheapest moment to repair it.
Screen And Recoat Or Full Sand: How To Tell
The real question is whether the damage is in the finish or in the wood:
- Water drop test. Put a few drops on a worn area. If they bead, finish is still protecting the wood. If they soak in and darken the board, the finish is worn through and a recoat alone will leave a visibly different patch.
- Fingernail test. A scratch that cannot catch a nail is often only in the topcoat. One that catches and shows pale raw wood needs sanding.
- Grey or black marks. Grey usually means exposed wood that has absorbed dirt. Black rings under plant pots or near pet bowls are a reaction between water, iron and oak tannins, and often go deeper than sanding can reach.
- Contamination. Wax, acrylic floor polish and silicone cleaners can make a new coat peel or fisheye. A good refinisher asks what you clean with and does an adhesion test before promising a recoat.
Factory prefinished solid hardwood, the kind with small bevels on every edge, is a special case. Its very hard aluminium oxide finish resists the abrasion a recoat depends on, and a full sand must go deep enough to remove the bevels, which uses up more wood than sanding a square edged floor.
| What you see | What it usually means | Typical approach |
|---|---|---|
| Dull lanes, fine scuffs, water still beads | Finish worn but intact | Screen and recoat |
| Grey patches where water soaks in | Finish worn through to wood | Full sand of the room, since spot sanding rarely blends |
| Deep scratches, claw gouges, dents | Damage in the wood itself | Full sand; deep dents may stay faintly visible |
| Black rings or dark pet stains | Moisture and tannin reaction deep in the board | Test sand; often lace in replacement boards |
| Board edges higher than centres (cupping) | Moisture coming from below | Fix the moisture first, then reassess |
| Nail heads, tongues or splits at the surface | Wear layer used up | Partial or full replacement |
How Many Times Can Solid Hardwood Be Sanded?
It depends on how much wood sits above the tongue and how carefully earlier sandings were done. Standard three quarter inch solid strip has roughly a quarter inch of usable wood above the tongue. A careful full sand removes only a small part of that, but an aggressive operator chasing deep scratches can take far more in one visit. That is why quoted numbers vary so widely: a floor sanded twice by a skilled crew may have years of life left, while one sanded hard several times may have dips in front of doorways and around registers.
Ways to check before committing:
- Lift a floor register and look at the board edge in cross section to see how much wood sits above the tongue.
- Check board ends at thresholds or at the top of the basement stairs.
- Look for face nail heads near walls; nails close to the surface limit how deep the sander can go.
- Thin oak strip found in some older homes has much less to give and may only tolerate a light sand.
Engineered hardwood has a real wood wear layer glued over a plywood or composite core. A thick wear layer can often take a light sand or two, while a thin one may only handle a recoat; sanding through it exposes the core and cannot be patched invisibly.
Stain, Colour Testing And Species Behaviour
Stain is where hardwood floor refinishing goes right or wrong in a way that lasts a decade.
Species matters more than the sample card
Red oak, found in a great many post-war Ontario homes, has open grain and a warm, slightly pink undertone. It takes most stains evenly, but grey and cool tones can look muddy over it, which surprises people who chose a colour from a white oak photo. White oak has a tighter, more olive grain and suits greys and natural looks. Maple and birch are dense and blotch under pigmented stain, so dark colours on them often look patchy.
Sanding grit changes the colour
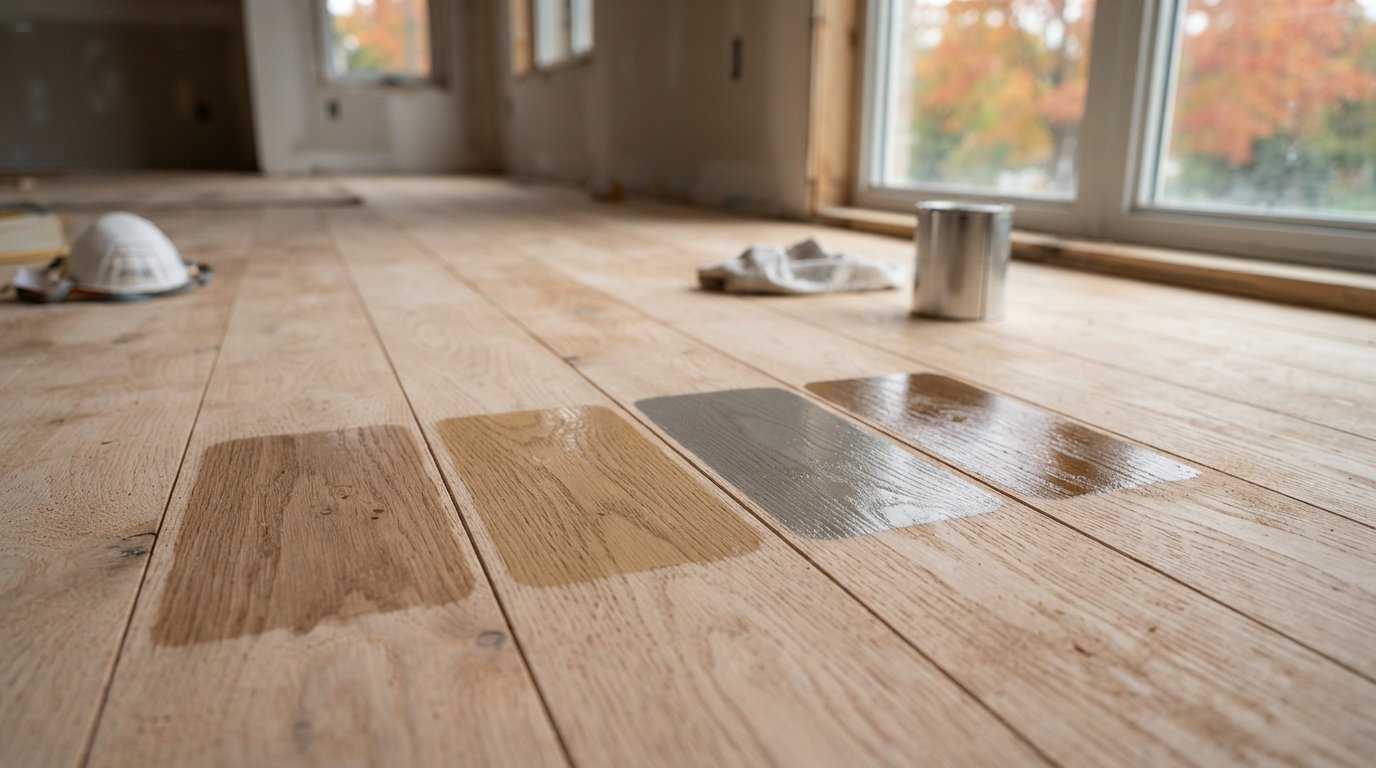
Finer final sanding closes the grain and gives a lighter result. A slightly coarser final pass, or water popping, where the floor is lightly dampened to raise the grain, lets the wood take more stain for a deeper, more even colour. That is why samples must be done on your sanded floor, not on a scrap board at the store.
How to run a proper colour test
- Ask for samples after the final sanding pass, in a spot with good natural light.
- Test three or four colours, including one shade lighter and one darker than your first pick.
- Have the chosen finish applied over the samples. Oil-modified finish adds an amber warmth; water-based stays closer to the raw stain.
- Look at them in morning and evening light with your own bulbs on.
Very dark stains show dust, pet hair and fine scratches far more than mid browns or natural finishes.
Oil-Modified Vs Water-Based Finishes In Autumn
Oil-modified polyurethane builds a warm amber tone that deepens with age and is forgiving to apply. The trade-offs are strong solvent odour, higher VOCs, long recoat times and a long cure. With windows closed in October the smell lingers for days, so most families stay elsewhere.
Water-based polyurethane dries far faster between coats, stays clear and has a much milder smell. Two component versions, with a crosslinker mixed in just before use, are among the most durable options and suit homes with pets. On red oak they can look slightly cool, so see a sample first.
Penetrating hardwax oils soak in rather than forming a film. They give a natural low sheen and allow spot repairs, but need periodic maintenance coats and resist standing water less well.
| Finish type | Look over time | Typical time between coats | Odour with windows closed | Autumn considerations |
|---|---|---|---|---|
| Oil-modified polyurethane | Ambers and warms | Often 8 to 24 hours, longer when cool | Strong, lingers for days | Plan to be out; pilot lights nearby must be off |
| Single component water-based | Stays mostly clear | Often 2 to 4 hours | Mild | Needs steady room temperature to level and cure |
| Two component water-based | Clear, very hard wearing | Often 2 to 4 hours | Mild | Good for fast turnaround with pets and children |
| Penetrating hardwax oil | Natural, low sheen | Varies widely by product | Low to moderate | Cures slowly in cold rooms; check temperature limits |
These are general patterns. The product’s technical data sheet sets the real dry, recoat, light traffic and full cure times, plus the allowed temperature and humidity range, so ask which product will be used and read that sheet.
Heat, humidity and safety
Finishes need warmth to cure, so keep the heat on through the job. Many crews cover supply and return grilles while sanding, switch off the furnace fan while a coat goes down and sets up, then restore normal heat. Bathroom fans or an HRV clear moisture and odour without opening windows to damp air and blowing leaves. With oil-based stains and finishes, vapours are flammable: pilot lights on gas fireplaces or older water heaters near the work must be off, and soaked rags must be dried flat outdoors or kept in a sealed metal can of water because they can self ignite.
Dust Containment, Pets And Furniture
Dust. Sanders connected to strong vacuum or cyclone extraction capture most dust at the source, but “dustless” is a marketing word, not a promise. Expect sealed doorways with zipper doors, taped registers, a closed off stairwell and emptied closets in the work area, since edging produces the finest airborne dust. If a floor or its border was ever painted, say so before work starts: old paint can contain lead and needs stricter containment.
Pets. Keep animals entirely away while coats are applied, because one paw print means resanding that board, and off the floor until the finish has cured enough to resist claws. Afterwards, trimmed nails, a runner on the main dog route and a satin or matte sheen hide everyday scratches. Put water bowls on a waterproof mat to avoid the black rings described above.
Furniture and rugs. Rooms must be completely empty. Light felt padded furniture can often return within a few days; heavy pieces should wait longer and never be dragged. Rugs are what people return too early. A rug on uncured finish can trap solvent and imprint the surface, so wait for the full cure time on the product sheet, often a couple of weeks or more.
A Typical Hardwood Floor Refinishing Schedule
For an open living and dining area with a hallway and water-based finish, the sequence usually runs like this. Oil-modified finish stretches the coating stage considerably.
- Preparation: rooms emptied, shoe moulding removed, loose boards and squeaks fixed, replacement boards laced in.
- Sanding day: coarse, medium and fine passes, edging, scraping, buffing, then thorough vacuuming and tacking.
- Stain, if chosen: samples approved, stain applied and left to dry fully; cool rooms extend this.
- Coating: sealer and two topcoats with light abrasion between coats.
- Return to use: socks for the first day or so, light furniture after a few days, rugs after full cure.
Stairs and nosings add time because so much of that work is by hand. If the basement is damp, deal with it first, ideally as part of any basement renovation, since humidity from below is the usual reason a freshly finished floor cups or gaps the following year.
When Boards Are Past Refinishing
Sometimes the most useful thing a contractor can tell you is that hardwood floor refinishing will not solve the problem:
- Tongues or nails show. Once the tongue appears at seams or nail heads sit at the surface, there is nothing left to sand.
- Deep pet or water stains. Dark marks that survive a test sand run through the board. Lacing in matching boards, staggered so seams do not line up, is usually the fix.
- Cupping. This is a moisture problem. Sanding a cupped floor flat before the moisture is fixed thins the board centres, and when the wood dries the boards crown permanently.
- Soft or moving areas. Bounce near a bathroom or kitchen points to subfloor or joist problems that must be opened up.
- Previous over sanding. Deep dips and wavy surfaces can be reduced, but sometimes only by spending most of the remaining wood.
Replacement rarely means the whole house: a damaged area can be woven into the existing floor and then included in the hardwood floor refinishing of the surrounding rooms.
Rough Costs And What Drives Them
Refinishers usually price by the square foot. Treat these hardwood floor refinishing figures as rough estimates: condition, access and the number of small rooms all move them.
| Job | Rough estimate | Adds cost |
|---|---|---|
| Screen and recoat | Often around $1.50 to $3 per square foot | Small areas, adhesion testing, extra coats |
| Full sand and clear finish | Often around $4 to $7 per square foot | Deep damage, two component finish, many small rooms |
| Full sand with stain | Often around $5 to $8 per square foot | Multiple samples, water popping, maple or birch |
| Stair treads and nosings | Commonly priced per step, often $60 to $150 each | Painted risers, spindles, winder steps |
| Board repairs and lace ins | Quoted by area or by the hour | Matching older species, widths or reclaimed stock |
Bundling floors with painting, new baseboards or a staircase update keeps disruption to one window, which is how our team usually approaches home renovation across Toronto and the surrounding regions.
Checking A Refinisher’s Quote
- Will you test wear and adhesion before recommending a screen and recoat?
- What dust extraction do you use, and how will you seal off the rest of the house?
- Which finish and sheen do you recommend for my household, and can I see its data sheet?
- Will stain samples be done on my sanded floor with finish over them?
- How many coats are included, and who handles shoe moulding and furniture?
Hardwood Floor Refinishing Questions We Hear Often
Can I stay in the house while the floors are done?
How do I know if a screen and recoat is enough?
Will sanding remove dark pet stains?
Is autumn a bad time for this work?
Can engineered hardwood be sanded?
How soon can furniture and rugs go back?
Book A Hardwood Floor Refinishing Assessment
A floor that is properly assessed, sanded, coloured and finished looks good for years and can be refreshed with a simple recoat long before it needs another full sand. Red Stone Contracting can assess your floors, explain whether hardwood floor refinishing, a recoat or partial replacement makes sense, and coordinate the work with any other updates so the house is disrupted only once.
Call us today at (905) 901-1006 or request a free estimate.
Floors, trim and original details brought back for Toronto homes and the wider GTA.