
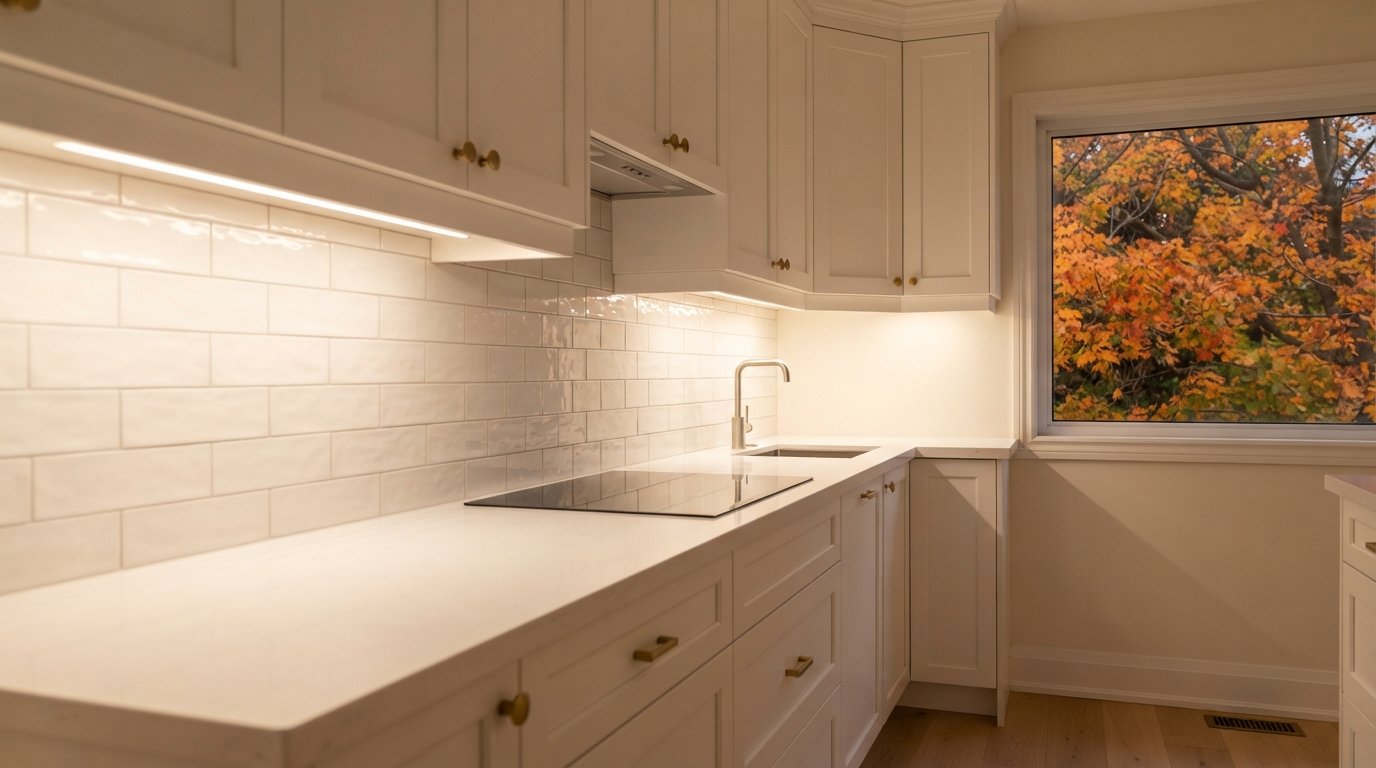
Under cabinet lighting is the light you actually work by in a kitchen. Ceiling pot lights sit behind you, so your own head and shoulders throw a shadow onto the counter right where the knife and cutting board are. A strip of light tucked beneath the upper cabinets fixes that, and as the autumn evenings draw in earlier, it becomes the light most households switch on first. The best results come from planning it while the cabinets are being installed, not after the backsplash is finished.
Four decisions shape the result: the fixture type, how it is powered, where the driver lives and where the light sits under the cabinet. Colour temperature and colour quality then decide whether the counter and backsplash look the way they did in the showroom.
Why Under Cabinet Lighting Belongs In The Cabinet Plan
Most disappointing under cabinet lighting installations share one cause: the lighting was an afterthought. Once the uppers are hung and the backsplash is tiled, the only way to get power to the fixtures is a plug-in cord or wiring fished through finished walls. The fixtures end up wherever they fit, and the driver sits on top of a cabinet or in a drawer.
When the lighting is part of the cabinet drawings, the details fall into place. The electrician runs cable to the right spots before drywall or during the rough-in, the cabinet maker adds a light rail or a recessed bottom to hide the fixtures, and the driver gets an accessible, ventilated home. In a kitchen renovation, we decide these points at the same meeting where door styles and hardware are chosen.
The cabinet details that matter
- Recessed cabinet bottoms. Many cabinet lines can set the bottom panel up from the lower edge of the box, leaving a shallow cavity that hides fixtures from view.
- Light rail moulding. A small trim strip along the front lower edge of the uppers does the same job on cabinets without a recessed bottom.
- Wire entry points. Small holes through the back or bottom of each cabinet need to be planned so cables are not visible from below.
- Gaps over appliances. Fixtures may stop and start at the range hood, a microwave or open shelving. Each break needs its own connection.
A typical rough-in sequence
On a renovation where the walls are open, the work usually runs in this order:
- Layout. The cabinet drawings are marked with each lighting run, its length, any breaks at the hood or open shelves, and where the switch and dimmer go.
- Cable rough-in. The electrician runs cable from the switch location to a point behind each run, usually exiting the wall just above where the bottom of the upper cabinet will sit, so the connection ends up hidden inside or behind the cabinet rather than in the backsplash zone.
- Driver locations. Junction boxes or feed points are placed where drivers will live, typically above the uppers, and their access is confirmed before crown moulding is ordered.
- Cabinet installation. Installers drill wire entries through cabinet backs or bottoms exactly where planned, and fit the light rail or recessed bottoms.
- Fixture installation. Channels, tape or bars go up, are connected, tested and checked for even brightness before the backsplash is tiled.
Testing the under cabinet lighting before tile is the step most worth insisting on. Discovering a dead section or a flickering dimmer after the backsplash is grouted is far more disruptive than fixing it on the day the cabinets go in.
Fixture Types: LED Tape, Pucks And Bars
There are three main styles of under cabinet lighting, and the right one depends on the cabinets as much as on the look you want. They differ in how evenly they light the counter, how visible they are and how they are wired.
LED tape
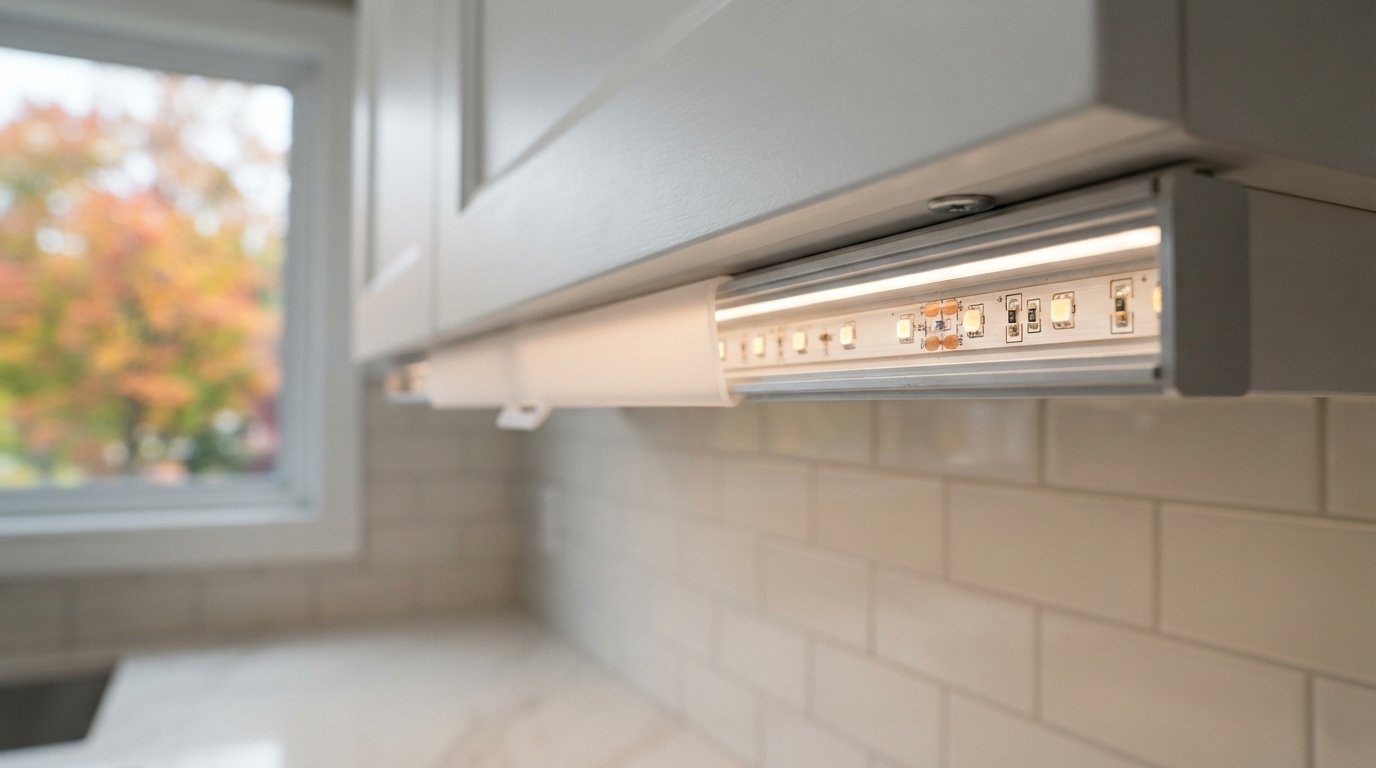
Flexible LED tape is a thin strip with small diodes spaced along it. It is cut to length, mounted in an aluminium channel, and covered with a frosted diffuser. The channel matters: it draws heat away from the diodes, which helps them last, and the diffuser blends individual points of light into a smooth line. Tape mounted without a channel tends to show a row of bright dots reflected in glossy counters and can peel away over time.
Tape is the most flexible option for custom kitchens, because it can run continuously along every cabinet, wrap corners with connectors and fit the narrowest spaces. Newer high-density and chip-on-board tapes give an almost dotless line even with a shallow diffuser.
Puck lights
Pucks are small round fixtures, each producing a cone of light. They were common for years and still suit glass-front cabinets, display shelves and open shelving. Under uppers, they tend to create scalloped pools of light with darker patches in between, especially on a light-coloured backsplash. They also take more wiring connections than a continuous strip.
Linear bar fixtures
Bar fixtures are rigid housings with LEDs and a diffuser already built in. They come in fixed lengths that link together and are usually the easiest to install neatly in an existing kitchen. Some run on line voltage directly, others on low voltage with a separate driver. Their limitation is length: standard sizes rarely match cabinet widths exactly, which can leave small gaps.
| Feature | LED tape in channel | Puck lights | Linear bars |
|---|---|---|---|
| Light pattern on counter | Even, continuous wash | Pools with darker gaps | Even within each bar, small gaps between |
| Visibility from below | Very low with light rail | Visible unless recessed | Low with light rail |
| Fits custom lengths | Yes, cut to size | Spaced as needed | Fixed lengths only |
| Wiring complexity | Moderate, needs a driver | Higher, many connections | Low to moderate |
| Best uses | New cabinets, continuous runs | Display shelves, glass cabinets | Retrofits, simple layouts |
Hardwired Versus Plug-In
The power source decides how the system is switched and how tidy it looks.
Plug-in systems use a cord into a counter receptacle. They are easy to add later and need no wall work. The trade-offs are a visible cord, a receptacle permanently occupied, and a switch on the fixture itself or an inline switch rather than at the wall.
Hardwired systems connect to the house wiring and are controlled from a wall switch, usually beside the other kitchen switches. All wiring is concealed inside the walls and cabinets. This is the right choice in a renovation, because the walls are open and the cost of running cable is small compared with doing it later.
Hardwired under cabinet lighting is electrical work, so in Ontario it falls under the Electrical Safety Authority and normally needs an ESA notification. Having a licensed electrical contractor do the work and file that notification is the straightforward route. Whatever the system, plug-in or hardwired, buy fixtures and drivers that carry a recognized Canadian certification mark such as CSA or cUL, because uncertified products are common online.
Low-Voltage Drivers And Where They Hide
Most LED tape and many bar fixtures run on low-voltage direct current, commonly 12 or 24 volts. A driver converts household power to that low voltage. Choosing and locating the driver is one of the most overlooked parts of the job.

- Accessible location. A driver must stay reachable for replacement. Common spots include the top of the upper cabinets behind a crown moulding, inside a cabinet in a ventilated corner, or in a neighbouring cabinet behind a removable panel. Never bury it in a wall cavity with no access.
- Ventilation. Drivers produce some heat. Enclosing one in a tight, unventilated space shortens its life.
- Sizing. The driver’s capacity should exceed the total load of the fixtures with some margin, as the manufacturer recommends.
- Voltage drop. Long runs of tape can dim toward the far end. Higher voltage tape, feeding runs from the middle, or separate drivers for each run help keep brightness even.
- Dimming compatibility. The driver, the dimmer and the tape all need to work together. A mismatch causes flicker, buzzing or poor dimming range.
A tidy approach for a larger kitchen is one driver per cabinet section, each hidden above the uppers, fed from a single switched circuit. That keeps runs short and simplifies future repairs.
Colour Temperature And CRI
Colour temperature describes how warm or cool white light looks, measured in kelvin. Colour rendering index, or CRI, describes how accurately it shows colours. Both matter more under cabinets than almost anywhere else, because this light falls on food, counters and backsplash tile at close range.
| Colour temperature | Appearance | Typical use | Notes |
|---|---|---|---|
| 2700K | Warm, similar to traditional bulbs | Traditional kitchens, warm wood cabinets | Can make white stone look slightly creamy |
| 3000K | Warm white | Most residential kitchens | Popular balance of warmth and clarity |
| 3500K | Neutral white | Transitional and modern kitchens | Pairs well with grey or white cabinetry |
| 4000K | Cool white | Very contemporary or task-focused spaces | Can feel clinical in a living area |
| Tunable white | Adjustable range | Kitchens open to living space | Needs compatible controls |
Match the under cabinet colour temperature to the ceiling lights. Mixing a cool strip with warm pot lights makes the counter look like a separate zone. For CRI, look for products rated 90 or higher. Lower-CRI LEDs can make food look dull and stone or tile appear a slightly different colour than in the showroom.
Placement: Front Edge, Glare And Stone Counters
Where the fixture sits under the cabinet changes everything about how the light looks. The general rule is to mount under cabinet lighting toward the front edge of the cabinet bottom, just behind the light rail or the front lip of a recessed bottom.
- Even coverage. From the front, light spreads across the full depth of the counter and up the backsplash evenly.
- Less glare on stone. Polished quartz and granite reflect like a mirror. Fixtures mounted at the back, close to the wall, often show up as bright lines or dots in the counter surface. Front-mounted fixtures angled slightly back reduce those reflections.
- Hidden from view. The light rail blocks the direct view of the fixture from a standing position, and from a seated position at an island.
- Backsplash texture. Rear-mounted lights graze the backsplash, exaggerating every grout line and uneven tile. That can look dramatic on handmade tile but harsh on a flat slab.
Some fixtures come with angled clips or channels that direct light toward the backsplash. They help in kitchens with glossy surfaces or deep counters.
Dimmers, Switching And Controls
Under cabinet lighting is often the only light on late in the evening, so a dimmer is worth including, and it lets the same strip serve as bright task light and soft night light. A few points to plan:
- Choose a dimmer the fixture or driver manufacturer lists as compatible.
- Put the under cabinet switch beside the main kitchen switches so it is easy to reach.
- Consider separate zones for a coffee station, a bar area or glass display cabinets.
- Smart switches and motion sensors can work well but need compatible drivers.
Settle switch locations on the cabinet drawings rather than on site, so the electrician knows exactly where each run starts and stops. For kitchens handled by our York Region home renovation team, the lighting plan is signed off before the cabinet order is placed.
Common Under Cabinet Lighting Problems And Their Causes
- Visible dots of light reflected in the counter: tape installed without a diffuser or too far back.
- Flicker or buzzing when dimmed: incompatible dimmer and driver.
- One end dimmer than the other: voltage drop on a long run.
- Uneven colour between sections: fixtures from different batches or brands.
- Early failure: tape without an aluminium channel, or a driver overheating in an enclosed space.
- Cords and connectors visible: no light rail or recessed bottom, or wire entries in the wrong place.
What Under Cabinet Lighting Typically Costs
Cabinet length, fixture quality and how much wall has to be opened drive the price. The figures below are rough estimates, and every kitchen differs.
| Setup | Estimated range | Biggest variables |
|---|---|---|
| Plug-in fixtures for a small kitchen | Often $100 to $400 in materials | Fixture quality, number of runs |
| Hardwired LED tape in channels during a renovation | Commonly $800 to $2,500 | Linear footage, drivers, dimmers, zones |
| Hardwired bars or pucks during a renovation | Often $600 to $2,000 | Number of fixtures and connections |
| Retrofit hardwired lighting in a finished kitchen | Frequently $1,200 to $3,500 or more | Wall opening, patching, backsplash access |
| Smart or tunable white controls | Often several hundred dollars added | System brand, number of zones |
Points To Settle With Your Electrician
- Which fixture type do you recommend for these cabinets, and will it be hidden from below?
- Where will the drivers be located, and are they accessible?
- What colour temperature and CRI are the fixtures?
- Are the dimmer and driver listed as compatible?
- Will the light be mounted toward the front, and how will glare on the counter be controlled?
- Who is doing the electrical work, and will ESA be notified?
If the lighting is one piece of a bigger layout change, our design solutions work puts lighting, cabinetry and electrical on one set of drawings.
Is LED tape or puck lighting better under cabinets?
Should under cabinet lights be hardwired?
What colour temperature is best for kitchen task lighting?
Where should the light be mounted under the cabinet?
Where does the LED driver go?
Can I dim under cabinet lights?
Under Cabinet Lighting, Wired In Before The Backsplash
The best task lighting is the kind nobody notices until they switch it on. Red Stone Contracting coordinates fixtures, drivers and wiring with the cabinet installation, so every run is concealed and every switch is where you expect it. Call us today at (905) 901-1006 or request a free estimate.
Kitchen lighting and cabinetry planned together for York Region homes and the wider GTA.