
A tub to shower conversion looks simple on paper: pull out the old alcove tub, build a shower in the same footprint. In practice, it is one of the more technical bathroom jobs we do. The drain almost always has to move, the floor has to slope in a new direction, the waterproofing has to be built from scratch, and the old framing under the tub often holds surprises.
Here is how a tub to shower conversion actually goes, the choices you will face, and where these projects go wrong.
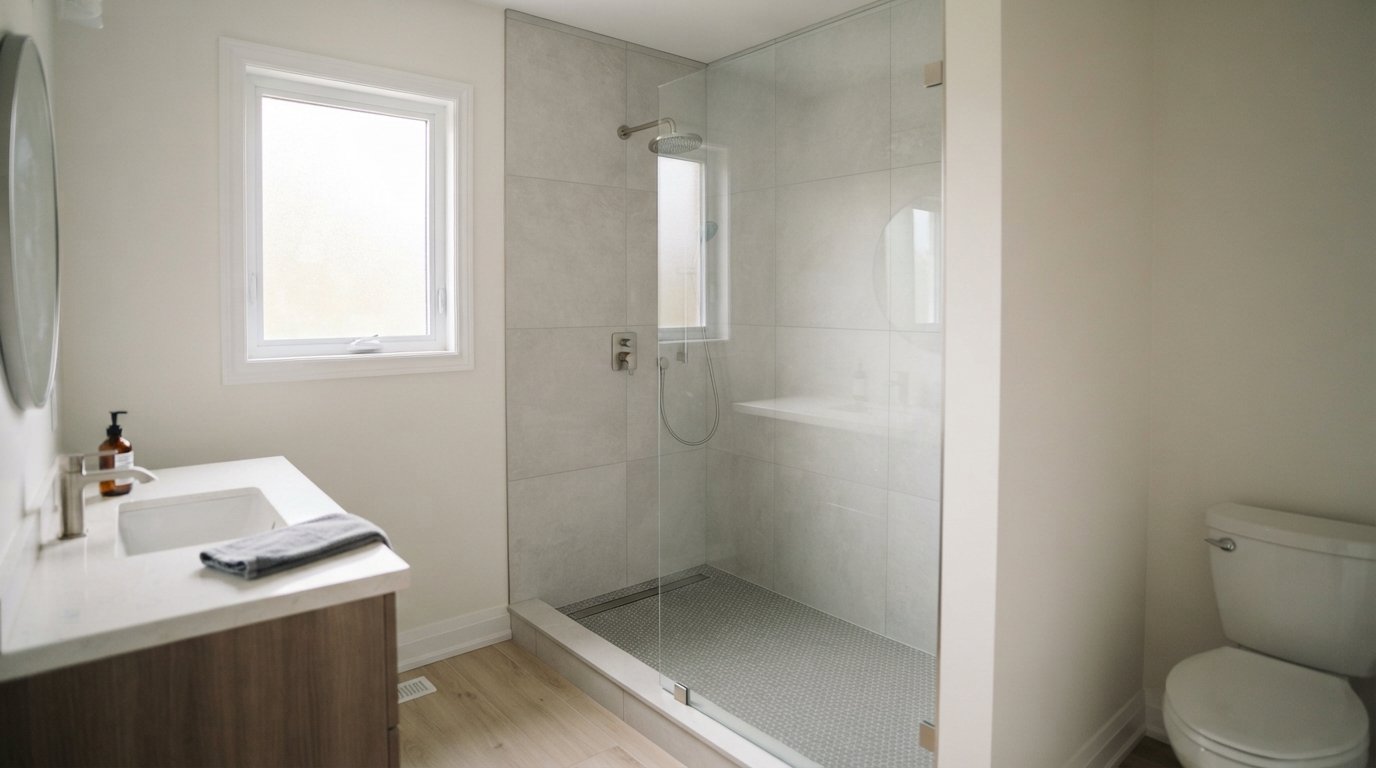
Is A Tub To Shower Conversion Right For Your Bathroom?
Most alcove tubs are about 60 inches long and 30 to 32 inches deep. That footprint makes a comfortable shower for most people, although at the narrower end of that range it will feel snug compared with a dedicated stall. Before committing, think about three things.
Is this the only tub in the house? Many buyers with young children look for at least one bathtub. If the bathroom you are converting holds the home’s only tub, consider whether another bathroom can take one, or whether the resale trade-off matters to you. There is no rule, but it is worth deciding deliberately.
Can the drain move? A tub drain sits at one end of the tub, close to the floor. A shower drain sits somewhere else, either in the centre of the floor or along one wall, and it needs space below for a trap. Whether that is easy depends on the joist direction and what is underneath.
What else will change? Most conversions become a broader update: new valve, new tile, new glass, often a new vanity and floor. Our bathroom renovation work usually treats a conversion as part of a full room plan so finishes, lighting and ventilation are designed together.
Demolition And What We Usually Find Under The Tub
Every tub to shower conversion starts the same way. Removing a tub means taking out the tile or surround to the studs, disconnecting the drain and overflow, and pulling the tub. Steel and cast iron tubs are heavy; cast iron is often broken up in place.
Once the tub is out, the subfloor and framing are exposed. In older houses, this is where the real scope of the job becomes clear. Common findings include:
- Rot under the drain end from a slow leak at the drain or overflow gasket over many years.
- Notched or cut joists where a previous plumber cut through framing to run the tub drain.
- Old drain materials such as cast iron, galvanized steel or lead bends that should be replaced while everything is open.
- Undersized or sagging joists that were adequate for a tub on its own but will flex under a tiled mortar bed.
A good contractor prices a contingency for this and explains what will be done if framing needs repair. Sistering damaged joists, adding blocking and replacing rotten subfloor are normal parts of a conversion in an older home.
Drain Relocation, Trap Sizing And Venting
Plumbing is the part of a tub to shower conversion that decides most of the cost and schedule, so it is worth understanding before you choose tile or glass.
Where the drain goes
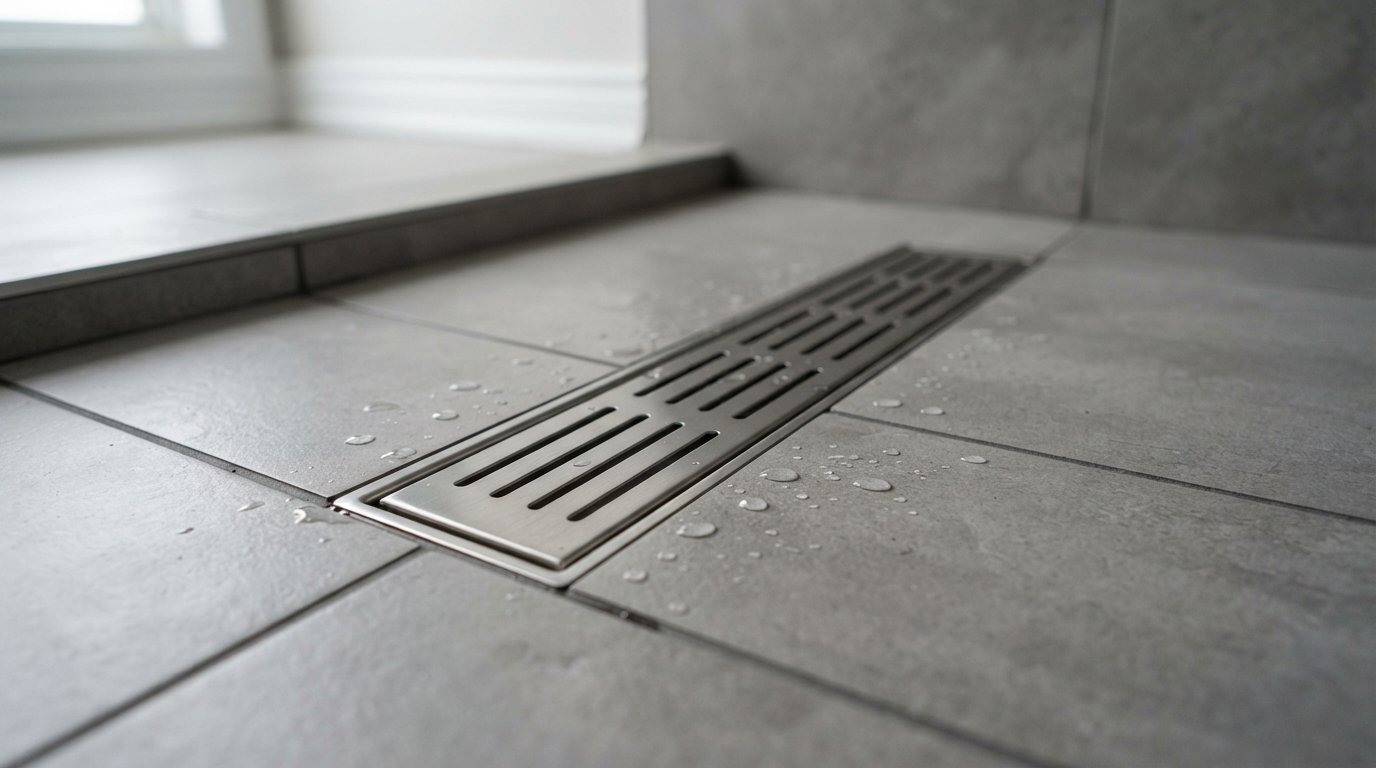
The two common layouts are a centre drain with the floor sloping in from all sides, or a linear drain along the back or entry side of the shower with the floor sloping one way. The choice affects framing, tile and cost, and is covered in more detail below.
Trap size
Tub drains are commonly 1-1/2 inch. Many plumbers install a 2 inch trap and drain for a walk-in shower because a shower floor needs to clear water quickly and there is no tub volume to buffer a slow drain, particularly with a rain head or more than one outlet. The minimum sizes are set by the Ontario Building Code plumbing provisions, and your plumber should confirm what applies to your fixture and layout.
Slope and venting
The new drain line needs a consistent downward slope to the stack, commonly around 1/4 inch per foot for small drain lines. The trap also has to be vented within a limited distance, which is often where the difficulty lies: a new drain location may be too far from the existing vent and need a new vent connection inside the wall. Relocating drains generally needs a plumbing permit and inspection from your municipality, so check with the local building department before work starts.
Joists and drain routes
If joists run the wrong way for the new drain path, the pipe has to pass through them. Holes and notches in joists are limited in size and location, and cutting a deep notch at mid-span to make a drain fit is how floors end up sagging. When the path does not work, the options are to reroute the drain, add headers and reframe with proper support, or relocate the drain to a spot the framing allows.
Curb Or Curbless
This is one of the biggest design decisions in a tub to shower conversion. A curb is the low step at the shower entry that keeps water in. A curbless, or zero-threshold, shower has no step: the bathroom floor flows directly into the shower. Curbless looks cleaner and feels more open, but in a wood-framed house it takes significantly more work.
| Factor | Curbed shower | Curbless shower |
|---|---|---|
| Floor structure | Shower floor built on top of the existing subfloor | Shower area must be recessed, or the rest of the floor raised |
| Framing work | Usually minimal | Often lowering subfloor between joists or reframing; may need engineering input |
| Water containment | Curb stops water at the entry | Relies on slope, drain placement and glass layout |
| Waterproofing area | Shower walls and floor | Often extended well beyond the shower into the room |
| Look and feel | Traditional, still clean with a low curb | Seamless, open, suits large-format tile |
| Relative cost | Lower | Higher, sometimes considerably |
In many older houses a low curb of a couple of inches gives most of the visual benefit with far less structural work. If curbless is important to you, ask your contractor to check joist size, direction and span before promising it.
Sloped Mortar Bed Or Linear Drain
Every shower floor has to slope to the drain, commonly around 1/4 inch per foot. How that slope is built changes the look and the tile options.
Centre drain with a four-way slope
The traditional approach. A mortar bed, or a preformed sloped tray, falls from all four sides to a centre drain. The floor has creases running toward the drain, so small tiles or mosaics are used to follow the slope. It is proven and cost-effective.
Linear drain with a single-plane slope
A long, narrow drain is set along one wall or at the entry. The floor slopes in one direction only, which allows large-format tiles to run across the shower floor and even continue from the bathroom floor. Linear drains suit curbless showers well. They cost more, need careful levelling, and the drain body must be tied properly into the waterproofing.
| Consideration | Centre drain, four-way slope | Linear drain, one-way slope |
|---|---|---|
| Floor tile options | Small tiles or mosaics to follow the slope | Large-format tile possible across the floor |
| Curbless suitability | Possible but more complex | Well suited |
| Drain location | Middle of the floor | Along the back wall, side wall or entry |
| Material cost | Lower | Higher drain and trim cost |
| Cleaning | Small grate, more grout lines | Long grate to clean, fewer grout lines |
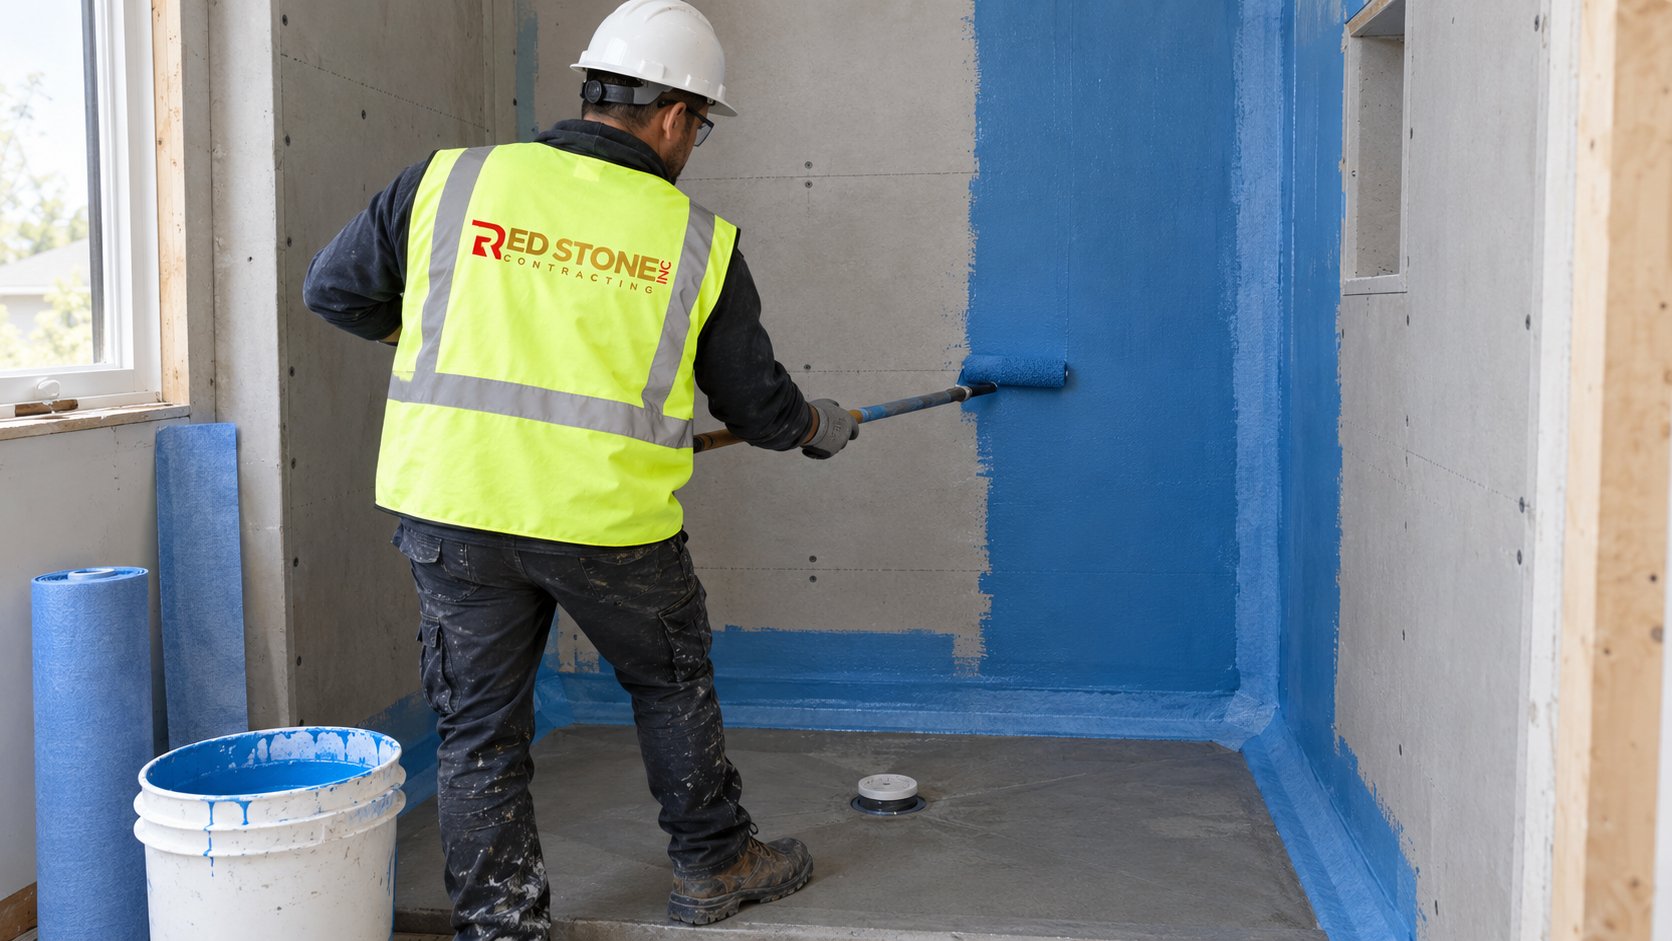
Waterproofing: Sheet Membrane Or Liquid Membrane
Tile and grout are not waterproof. The membrane underneath is what keeps water out of your walls and floor. There are two main approaches for a modern tiled shower, and both work when installed to the manufacturer’s instructions.
Sheet membranes
Thin, fabric-faced sheets are bonded to the substrate with thin-set mortar. Seams overlap by a set amount and corners get preformed pieces. The thickness is consistent because it comes from the factory, which makes quality easier to control. The skill is in the seams, corners and pipe penetrations.
Liquid-applied membranes
A paint-on or roll-on product applied in two or more coats, often with reinforcing fabric at corners and seams. It follows curves and awkward shapes easily. The weakness is thickness: too thin and it does not perform. Good installers check thickness as they go, following the manufacturer’s coverage rates.
Whichever system is used, the key details are the same:
- Waterproofing tied into the drain flange or linear drain body, using parts from the same system
- Sealed penetrations at the valve and shower head
- Waterproofing extended onto the curb, and beyond the shower for curbless designs
- Niches and benches waterproofed as carefully as the flat walls
- A flood test on the floor before tiling, so any leak shows up before it is buried
| Factor | Sheet membrane | Liquid-applied membrane |
|---|---|---|
| Thickness control | Consistent, set at the factory | Depends on coats and coverage rate; must be checked |
| Corners and seams | Preformed corners and overlapped, bonded seams | Reinforcing fabric embedded in the corners and joints |
| Curves and odd shapes | Slower to detail around curves and small pieces | Follows curves, benches and niches easily |
| Curing time | Tile can usually follow once the thin-set allows | Each coat must dry before the next and before flood testing |
| Common failure point | Poorly bonded seams or folded corners | Thin spots and pinholes from too little product |
Mixing components from different manufacturers is a common cause of failure and can also affect warranty coverage. Ask which system is being used and check the manufacturer’s current documents.
Glass, Valves And Finishing Details
Glass sizing
In a 60 inch alcove, the common options are a sliding door across the full width, a hinged door with a fixed panel, or a single fixed panel with an open entry. A fixed panel covering part of the width looks clean, but leave enough opening, often somewhere around 22 to 24 inches or more, and place the shower head so it sprays away from the gap. Hinged doors must swing out into the room, so check they clear the toilet and vanity. Glass is measured after tile is finished, which adds lead time to the schedule.
Valve and fixtures
A tub valve with a spout and diverter is usually replaced with a shower valve at a more comfortable height. Pressure-balancing or thermostatic valves protect against sudden temperature swings. A handheld shower on a slide bar makes cleaning easier. These choices affect in-wall plumbing, so make them before the walls close.
Ventilation
A shower produces more steam than a bath. A properly sized exhaust fan ducted to the outside, not into the attic, protects paint, drywall and the ceiling above.
What Can Go Wrong, Especially In Older Houses
- Floor flex cracks tile. Joists that were fine under a tub can deflect under a mortar bed and tile. Reinforce framing before tiling.
- Slow drainage and pooling. Poor slope, a drain set too high, or an undersized trap leave water sitting on the floor.
- Water at the glass. A fixed panel too short for the shower head position lets spray escape onto the floor.
- Leaks into the ceiling below. Usually from a poor membrane connection at the drain or a skipped flood test.
- Uneven transitions. A new mortar bed can raise the shower floor above the bathroom floor if heights were not planned.
Across our York Region home renovation projects we see many bathrooms where an earlier conversion skipped framing repair or waterproofing details. Fixing those means starting again from the studs.
The Order Of Work, Step By Step
Knowing the sequence helps you understand where inspections happen and why the schedule has waiting periods built in.
- Protection and demolition. Floors and the path out of the house are covered, and the tub, surround and damaged drywall come out.
- Framing repair. Rotten subfloor is replaced, damaged joists are sistered, and blocking goes in for glass hardware, grab bar locations and a niche.
- Plumbing rough-in. The drain is relocated and vented, and the new valve and shower head supply lines are set. Inspection happens here where a permit applies.
- Floor slope and backer board. The sloped mortar bed or tray goes in, and cement board or foam board goes on the walls.
- Waterproofing and flood test. The membrane is installed, then the floor is plugged and filled with water to check for leaks.
- Tile and grout. Walls, floor, curb and niche are tiled, then grouted and sealed where the grout requires it.
- Trim, glass and fixtures. Valve trim and the shower head go on, glass is measured and installed, and silicone joints are finished.
Typical Cost And Timeline
Costs vary with the house, access and scope, so treat this as a rough guide. A straightforward tub to shower conversion with a curbed shower, standard tile and a sliding or hinged glass door often falls somewhere in the range of $12,000 to $22,000. Curbless designs, linear drains, large-format or natural stone tile, framing repairs and custom glass can push it well beyond that. Timelines are commonly two to four weeks of work, plus the wait for custom glass after tiling.
Will removing my only bathtub hurt resale?
Does the drain always have to move?
Can I have a curbless shower in an older house?
Which is better, sheet or liquid waterproofing?
How long does the project take?
Can the new shower keep the old tub’s plumbing wall?
Planning Your Tub To Shower Conversion
A good tub to shower conversion comes from getting the hidden work right: drain, slope, framing and waterproofing. Red Stone Contracting plans conversions from the subfloor up, coordinating licensed plumbing, permits where required, waterproofing and tile so the finished shower drains properly and stays dry behind the walls.
Call us today at (905) 901-1006 or request a free estimate.
Serving homeowners across York Region and the wider GTA.